
You don’t have to choose between a full, all-at-once fence replacement and living with a wobbly line. In Austin, smart phasing means building the parts that matter most now—footings, gates, safety enclosures—and scheduling the rest when the budget and weather align. The secret is treating footings and drainage as permanent infrastructure, then layering panels and finishes later without rework. Start with a site-walk for your fence installation , lock in draining footings (gravel beds + crowned collars), fix gate geometry, create temporary containment, and plan segment-by-segment upgrades that match the final design so your yard looks intentional at every stage.
Why phasing fences works in Austin (and when it doesn’t)
 Austin soils are expansive east of MoPac and shallow on limestone to the west. That means fences fail first at the ground line—not because boards are the wrong color, but because post sockets pump water and gates rack after storms. Phasing works because you can front-load structure (footings, posts, drainage, gates) with the help of a contractor and install panels and finishes as the budget allows—without touching those structural pieces again.
Phasing also respects weather. Stain loves fall and mild spring; footing days land well in cooler, dry snaps between fronts. With a local Austin fence team mapping soils, drainage, and access on day one, you can incorporate maintenance plans and split the project into tidy steps that still look intentional between phases.
When phasing is a bad idea: when pool safety or visibility triangles demand immediate compliance; when rot is widespread in load posts; or when a shared property line is in dispute. In those cases, consolidate the structural scope up front (even if the visual upgrades wait).
The order that saves money: infrastructure first, cosmetics later
Think of your fence as two layers:
- Permanent infrastructure: post embedment and footing geometry (6–8″ compacted gravel beds, crowned concrete collars 1–2″ above grade, core-drilling 8–12″ into limestone where rock is shallow), drainage tweaks (small swales, DG toe bands, downspout extensions), and gate framing + thresholds.
- Replaceable layers: panels, trim/top caps, and stain/finish.
By putting dollars into the permanent layer first, every later phase snaps into place without tearing up what you already paid for.
Phase 0: plan, approvals, and neighborhood logistics
Before you split work, square away the paper and people.
- Measure and map: walk the line with strings at ground and top height; mark gate swing arcs and step locations.
- Soils probe: test several post spots; note where limestone shows and where clay stays slick after rain.
- Approvals: gather HOA sign-offs and any city visibility clearances once, with the final design—even if panels come later.
- Neighbors: agree on shared segments, stain color, and gate details; document in a one-page sketch.
- Storage & staging: designate a flat pad for materials you’ll install later; protect pavers with plywood lanes.
Phase 1: safety, security, and temporary containment
Keep pets in, keep hazards out.
- Triage repairs on obvious leaners; brace or remove truly unsafe sections.
- Temporary panels or interior pet gates secure the yard during multi-day or multi-phase gaps.
- Quick gate fix: if the latch bay is failing, a rigid temporary leaf buys time while permanent footings cure.
Where spot fixes make sense while you plan the full build of your commercial fence , loop in targeted fence repair work in Austin so you stabilize posts without over-building areas you’ll replace soon.
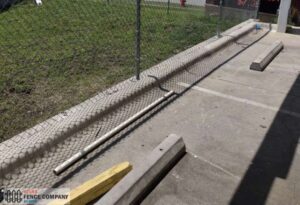
Phase 2: footings that you will never redo
This is the money phase—the one that protects every other phase.
- Embedment targets:
- 6′ privacy: 30–36″ in clay
- 7–8′ privacy: 36–42″ in clay
- Core-drill 8–12″ into limestone wherever rock is shallow
- Hole geometry: 10–12″ diameter for 4×4 posts; larger at corners and gates; 4×6 posts at gates, corners, and step transitions.
- Drainage: 6–8″ compacted clean ¾” rock at the hole bottom (geotextile wrap in fat clays), concrete from bottom up, cured with a crowned collar 1–2″ above grade—never flat.
- Toe health: install a 6–12″ decomposed-granite toe band along chronically muddy sections and extend downspouts to land past the fence line.
- QC snapshot: record embedment depths, core-drill points, and take photos of collars/base gaps for your project file.
If your future plan includes new lines or height changes, align footings now with your fence installation process in Austin so spacing and post sizes already match the final design.
Phase 3: panels by priority zone (and how to keep it pretty mid-project)
Install where it changes your daily life first—patio sightlines, play areas, and neighbor-facing runs.
- Sequence: back corner privacy → patio sightlines → utility side yard → low-visibility stretches.
- Base gap: maintain 2–3″ under bottom boards/rot boards; close dips with rock curbs that still let water pass.
- Wind relief: break very long runs with hidden control joints; add top caps to shade end grain and stiffen the line.
- Interim aesthetics: transition neatly between “new” and “not yet” with a short vertical trim batten; it looks intentional and keeps gaps tidy.
- Fasteners & hardware: exterior-rated coated or hot-dip galvanized; avoid mixed metals (e.g., copper with galvanization) that accelerate corrosion.
If you’re splitting one long run over several weekends, end each session at a post, not mid-panel—fewer re-touches, cleaner lines.
Phase 4: gates, operators, and latches that stay square
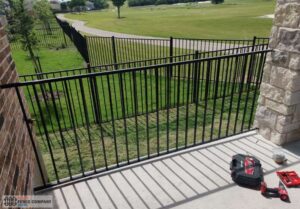
Gates fail first because they work hardest.
- Frames: use rigid steel frames for pedestrian and driveway leaves; lumber-only leaves twist with Austin’s wet/dry cycles.
- Hinges: adjustable, heavy-duty, barrels aligned on one axis; through-bolts beat lag screws.
- Thresholds: add a small broomed-concrete pad pitched away from hinges; set ~1″ leaf clearance so mud never drags.
- Latch placement: out of the most brutal west sun when possible (cooler, longer-lived hardware).
- Operator timing: if adding automation later, run conduit and set posts now so the future operator is a bolt-on, not a re-dig.
Phase 5: stain/finish and plantings in the right weather window
Leave finish to a mild, dry window—fall or gentle spring.
- Penetrating stains breathe and are easy to maintain; plan a 2–3 year refresh on west-sun runs.
- Prep: confirm water beads; if not, you’re ready for a coat. Keep irrigation off faces 48–72 hours after staining.
- Color & sheen: mid-light neutrals hide dust and run cooler; very dark espresso looks sharp but heats up and shows hard-water spotting faster.
- Native plantings: soften edges with evergreen sumac, hopbush, or little bluestem—all low-water and Austin-tough.
Phasing by yard type: small backyards, corner lots, greenbelt edges, and pools
Small backyards
Build the patio backdrop first (two or three bays), then run panels outward over time. A top cap ties old/new together visually.
Corner lots
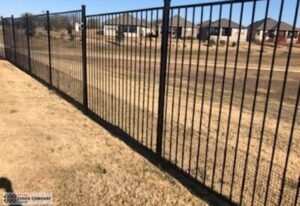
Respect visibility triangles now—taper heights near driveways and intersections. Plan open profiles where required, even if those stretches come later.
Greenbelt edges
If your HOA wants see-through metal, do the gate bay + safety returns first for security; add metal stretches afterward without touching footings.
Pool enclosures
Prioritize self-closing, self-latching gates and compliant lock heights in phase one. Overbuild those posts so later additions don’t knock gates out of spec.
Cost controls and scheduling tricks that actually help
- One mobilization for footings: set all posts and collars in one shot; panels can follow later with smaller mobilizations.
- Batch materials by zone: buy complete panel kits per zone to avoid mid-phase mismatches.
- Stain once, right: do full visible faces in one season rather than piecemeal—looks better and avoids lap marks.
- Weather-smart calendar: plan footing days between fronts; schedule stain after a dry stretch and in shade-biased hours.
- Keep a project file: PDFs of approvals, invoice dates, product labels/QRs, and photos of collars/base gaps—useful for warranties and resale.
For more money-savvy ideas for your business (rebids, scope trims that don’t hurt longevity), skim this quick read: the ways to save on an Austin fence without cutting corners in our budget tips article.
Sample two-month and six-month phasing roadmaps
Two-Month Plan (typical small yard)
- Week 1: Phase 0 planning + approvals; utilities/irrigation flags; staging pad set.
- Week 2: Phase 1 safety + temp panels; quick gate stopgap.
- Week 3: Phase 2 footings for entire project; DG toe band on muddy side yard; downspout extensions.
- Week 4: Phase 3 panels for patio/back corner privacy; clean interim trim battens.
- Week 6–8: Phase 4 permanent gates; Phase 5 stain if weather cooperates.
Six-Month Plan (long runs or HOA timing)
- Month 1: Plan, approvals, utilities; footings installed everywhere; threshold pad poured at main gate.
- Month 2–3: Panels on high-impact zones (patio, neighbor windows), top caps added.
- Month 4: Remaining runs; rock curbs at dips; hidden control joints on long spans.
- Month 5–6: Gate operators and final hardware; stain/finish in the best weather window; plantings and cleanup.
What to avoid: the “cheap now, expensive later” traps
- Flat-topped collars—you’ll be re-posting next year.
- Skipping gravel beds in clay—pumps water, loosens sockets.
- Shallow stops at limestone—core-drill or expect rocking corners.
- Burying bottom boards—rots fast, traps mulch and moisture.
- Lumber-only wide gates—they twist; choose rigid frames and adjustable hinges.
- Mixed-metal hardware stacks—accelerate corrosion near irrigation drift.
- No DG toe band in muddy zones—your stain and rails will pay the price.